This is another model that has taken a long time to get anywhere.
One of the concerns was the terrible wheels. This is an eight wheel armoured car, but for some reason the kit designers decided that they would use a strange hollow design.
So, as they will be rather obvious, I have filled the hollow with Milliput. Hopefully when painted black they will look the part.
While building the turret, I did not use sufficient liquid poly to fix the smoke dischargers, and managed to lose one of them.
While looking through the spare parts box, I spotted some PSC Panther cupolas, and thought that they would make a nice protected IR search light for a Weird War vehicle.
A Rubicon German Stowage box for scale.
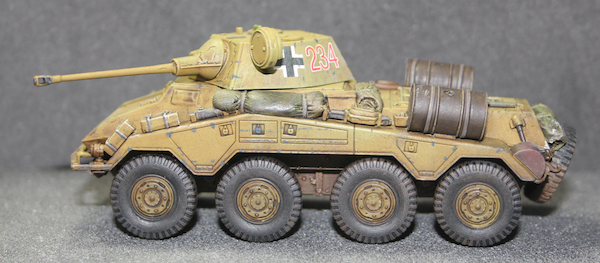
As this is now going to be a Weird War vehicle I decided that it needed lots of stowage as it would be ranging far and wide. One feature of the SDKFZ 234 series is the rear driving position allowing the vehicle to be driven equally in both directions. This does mean that the rear deck has to be kept clear to allow the second driver to see where he is going.
Fuel would be an issue, so a Rubicon fuel drum was added to the side deck. A fuel pump was added to the rear deck and a fuel hose was made up from solder.
I have not added the other four wheels as they will be painted separately.
The search light was added where the smoke discharger should have been located.
A piece from the SDKFZ 251 kit was added under the front bumper to represent tow lines.