Showing posts with label Stowage. Show all posts

Tuesday, March 24, 2020

"The whole thing starts with a box"

"The whole thing starts with a box
(A box? Is it steel?)
(Are there locks?)
(Is it filled with a pox?)
(A pox? how delightful a pox)"
 So what is in the mysterious box? Medical supplies, cans of beer, the some one's head?
A Crooked Dice box on a Renedra 25mm circular base.

Soon I might actually get round to doing some hobby stuff.

Friday, May 31, 2019

Rubicon M4 - part five

It was pointed out that there was a rather obvious seam line on the right sponson.

It has been filled with Milliput. There has been a small amount of weathering.

Sunday, March 24, 2019

Rubicon M4 Hybrid - part three

The Rubicon M4 Hybrid Firefly assembled. The darker grey patch is where the pistol port has been filled in (and checked for smoothness by painting it grey.


It is noticeable that the coax machine gun is a bit bent, I will fix that.


I am not going to add a great deal of stowage to this example.

Wednesday, March 20, 2019

Rubicon M4 Hybrid - part two

I have added lifting rings on the turret, blanked off the pistol port, and rotated the engine cover handles through 90 degrees.


Sunday, March 10, 2019

Rubicon M4 Hybrid - part one

At Salute 2018 I bought four of Rubicon's boxed kits. Last month I started work on the M4 Sherman I. This month I started on the Sherman I Hybrid.

 The box is the standard from Rubicon.
The chassis is the same as the M4.
The Hybrid hull comes on a separate sprue, the other three sprues in this photograph are the same as in the M4 kit.
The two turret 75mm sprue.
Instructions and sand shields.


Sunday, March 3, 2019

Rubicon M4 - part four

So here is the Rubicon M4 Sherman I base painted and with the decals added.

The decals will have a small amount of "chipping" using Vallejo Russian Uniform Green, This will also remove the rather prominent white line at the top of the 33rd Armoured Brigade's Diablo logo.

I have not been able to work out how the numbering system works on 144 RAC vehicles, the tank numbered 66 in British Tanks In Normandy and the Dennis Oliver book is from B company. I am going to assume that the numbers reset per company.

This tank is number 21 of C company. The font is not quite correct, I have had to use the (US) numbers from the Warlord M4 decal sheet.

The pistol port probably should have been removed (which would have assisted the number positioning).
Nothing has had a wash applied yet.
The spare wheel is rather prominent, it might need some additional mounting clips.

I removed the cubes of square section plastic rod that were holding the tow cable down and superglued the cable into the existing clips.


Monday, February 18, 2019

Empress 28mm BMD-2 IFV - part 4

So, further progress on the BMD-2.

The camouflage-net over the nose has had some additional bits added.
I was staring at the front of the BMD, and thought, maybe some additional armour would be nice.

I was looking through my bits and pieces and found the Crooked Dice Mattress set. The lower front of the hull is angled, so I used my trusty razor saw to first cut one in half but with an angled cut. I then made a similar angled cut so the two halves came together at a shallow angle. The two parts were then superglued to the hull front. The gaps were then filled with Greenstuff.
If I had thought about it earlier, I would have added some on the side.

Straps and a sling were added to the ammo box on the port side.


A similar sling was added to hold the Rubicon crate. A rolled tarpaulin was added to the two pegs, again out of Greenstuff.
Starboard side.
Port side.
View from above.

Thursday, February 14, 2019

Rubicon M4 - part three

There is a photograph of a 144th RAC Sherman with a a road wheel attached to the turret, so one of the spare ones was cemented to some 1.6mm plastic rod.

A length of 1mm rod was passed through holes drilled in the sides of the mudguards. This will be to hold stowage on the glacis.
Two holes were drilled in the hull, one on the glacis, the other on the rear deck. 0.4mm brass wire was passed through the holes and secured with superglue and two pairs of square section plastic rod cut into cubes.
Rubicon cable ends from the stowage set was glued over the wire where it went into the hull.
A piece of square section rod had been drilled and passed onto the wire to fix the cable at the front.
The cable was then superglued into the two cable grips on the hull.

Wednesday, January 23, 2019

Labours of Hercules - A Sherman VC part three

The crew of the Sherman VC "Hercules" gained fame after their epic battle against a Tiger Tank in the Normandy village of Nemea. Most of A Squadron were either beaten back or casualties, but Hercules made it into the village. There are two versions of what happened next.
In one version, even the fabled 17 pounder could not penetrate the Tiger's impregnable hide. Eventually, the crew scored a direct hit down the muzzle of the 88mm gun, blowing out the breech and detonating the Tiger's ammunition.
In the second version, Hercules out-manoeuvred the Tiger. first jamming the turret and then immobilising it. They then moved in to beat the Tiger to death at close range.
To commemorate their victory, the track from the Tiger and other tanks that met their end from their 17 pounder were draped upon the tank.
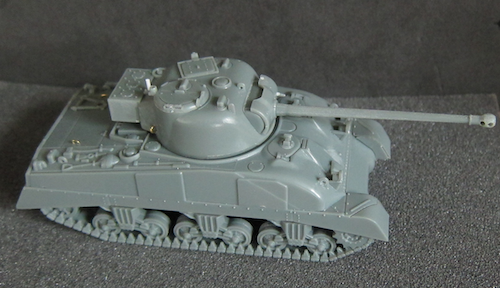
The Warlord Games Sherman VC has been fitted with the spare tracks from the Rubicon Tiger tank, plus track from the Rubicon German Stowage set.
A gun travel lock from the Rubicon Sherman I Hybrid replaces the moulded on travel lock. A cross brace was added so it looked more like the real thing.


As this is a fictional vehicle, I decided that the Division Insignia had been painted out by the censor.