At Salute I bought a number of MDF and grey board models from Sarissa Precision.
One of them was the
N109 Small House from the North Africa/Colonial series.
The kit comes securely shrink wrapped with a line drawing on the front (that sheet has the instructions) and a standard sheet on the back.
There is one sheet of grey board, laser etched with doors, windows and shutters. The doors and windows are on interior wall sheets, you do not need to remove the windows and doors, the whole sheet is added to the interior.
The floor and roof panels.
Walls and roof detail.
Other walls. If you are paying attention, you can see there will be an issue later.
I sprayed the inside of the interior walls with Halfords white acrylic. I then masked all but the windows, doors and shutters and sprayed them with Humbrol Dark Green.
The outside of the interior walls was masked so there was some cardboard to MDF contact for glueing. This was then sprayed with Army Painter Army Green paint.
The body of the building and the roof were assembled using PVA glue. The roof was left separate.
Milliput was use to fill any gaps.
Once it was dry, I masked the doors and windows (door frames on the outside as well). I also put masking tape in the gaps between the locating pegs on the body of the building. This was to ensure that the roof and building could be separated later.
The building was sprayed with Rustoleum Rust effect textured paint to give the MDF some texture. This was then sprayed with Halfords grey acrylic paint followed by Halfords white acrylic spray paint.
The texture does not fill in the laser etched detail on the walls.
I had masked areas on the inner side of the outer walls so that the PVA glue would have a suitable surface to glue the interior walls.
It was at this point I spotted a problem. The door and single window interior wall is horizontally flipped.
I had painted the interior wall to represent the door set into the wall.
This is how it was supposed to go, if the interior walls were correct.
With the interior wall panel flipped, they line up but there is no louvre detail on the door, and due to my masking, there is rather a lot of white edge.
I remasked the panel and masked and painted again so the "exterior" wall side was white with green doors and windows and the "interior" wall sprayed green.
The exterior walls were washed with Citadel Nuln Oil to bring out the surface detail. The exposed top surface of the base plate was washed with Citadel Agrax Earthshade.
This shows the revised door and window detail. As you can see, the door lacks detail.
Empress Miniatures and Gringo's 40 are in the process of releasing figures for Vietnam. Though this building os intended for North Africa, it is of a French Colonial flavour. Do not just take my word for it, there is a post on the
Lard Island blog where Big Rich is using a larger version of the building for a a rubber plantation.
I have two packs of Empress Vietnam US Marines. I do not have them painted yet, but I do have five French paratroopers from the Empress French Indochina, so here they are taking cover around the building.
The light machine gun provides support from the roof top.
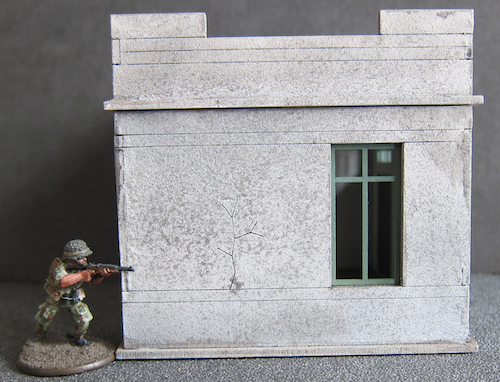
A rifleman shoots from cover.
Advancing past a building.
Two SMG armed troops prepare to assault the building while the rest of the squad protect them.
The squad observe the surrounding area from an elevated position.