Showing posts with label Inter-War. Show all posts

Sunday, August 14, 2022

Empress FT tank scale comparison

 I built one of the Empress FT tanks back in 2017 (and a Carden Loyd Carrier). The tank is not currently on the Empress site. I think it is 1/55 scale.

Though there is a scale photograph with the unfinished mode, there is not one of the finished model.

It is a really diminutive tank (and the garden Loyd is even smaller).

Mark Copplestone (I am surprised I have so few models tagged as sculpted by him) has been working on a range of Neo-Retro Wargaming and Pseudo-Nostalgia figures scaled at about 30mm.

They are fictional InterWar period figures with a distinct "toy soldier" look to them.


Here is a scale photograph of a 30mm lipped base propped up against the FT tank.


Sunday, September 15, 2019

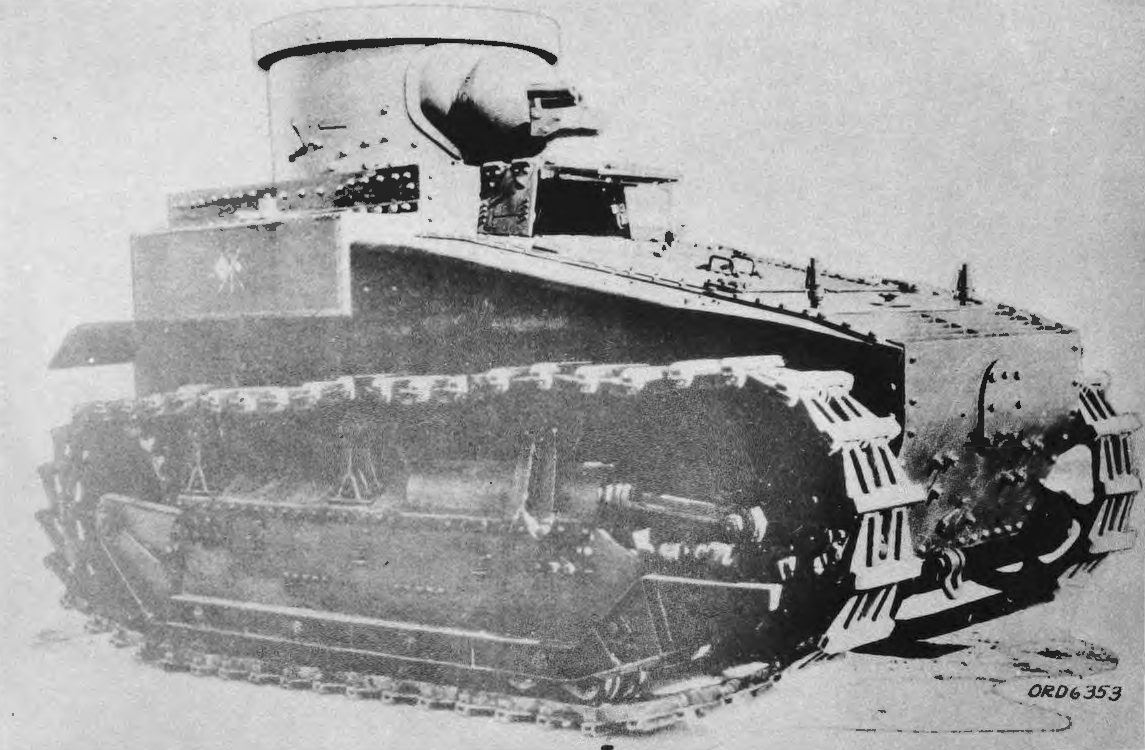
US T1E2 Light Tank

The US Light Tank prototype T1E2 was one of a series of Light Tanks built in the late 'twenties and early 'thirties.


The T1E2 was the third prototype model and had the engine in the front with the turret and the crew compartment at the rear. The turret was armed initially with a short 37mm gun and a coax 0.30" Browning, but was later armed with a long barrel 37mm Browning semi-automatic gun.

The Empress kit comprises a resin hull and turret, and white metal track units and gun barrel.

I managed to irreversibly bend the barrel, so decided to make my own out of brass rod.
 The track units do not have proper fixing points, so I drilled a couple of depressions into the hull and the track unit so the epoxy resin would have a better grip.

The gun barrel, recuperator and coax machine gun were made from 1.5mm diameter brass rod.

A  set of ammunition boxes from the Rubicon Allied Stowage Set was cut in half and fixed to the rear mudguards.
 Once assembled, the tank was given an undercoat of Citadel Chaos Black spray, followed by Humbrol 155 Olive Drab spray. The tracks were painted with a wet blended mix of Vallejo black, Vallejo Black Grey, and Army Painter Chaotic Red.
This was dry brushed with Citadel Nurgling Green dry brush paint. The track etc was retouched with a similar mix.
 The decals were from the Italeri 28mm scale M3 Stuart kit. I am not convinced about the US flag.


A comparison with the Carden Loyd MG carrier.


It now needs some weathering.

I did have a zoom in on the flag:
That is a fifty star flag, someone did not do their research.

Saturday, January 13, 2018

Panzer I Ausf B with Breda 20mm auto cannon finished... part 5

So, the Panzer I Ausf B is now more or less finished.
Okay, there is still some work to do on the wheels.
The crew has evidently stolen a fire bucket (a Rubicon Models bucket from one of the stowage).


William Killian faces down the Panzer.

Thursday, January 4, 2018

Panzer I Ausf B with Breda 20mm auto cannon continued... part 4

I have found the remaining white metal parts, though only the headlight was needed. I have added the two posts on the glacis for the first of the soft stowage.
A tarpaulin has been added to the glacis. A Rubicon Allied Stowage set crate has been placed behind the fire extinguisher.
The fixing of the bucket has been bulked up to indicate the loop. Not sure what is in the bucket. Note the bubble on the mudguard.
Another view of the new tarpaulin. An additional peg has been added to the front track guard.
A greenstuff tarpaulin has now been added to the right track guard. The tarpaulin is additionally secured to the front right tow hook.
One short and one long Rubicon Allied Stowage crate have been added to the engine deck.

A tarpaulin has been draped over part of the two crate. A small amount of greenstuff was used to fill the gap between the crates. The gap between the aerial and the hull mount has been bridged with greenstuff.
A view of the tarpaulin.


Next stop, spray painting.

Sunday, December 24, 2017

Panzer I Ausf B with Breda 20mm auto cannon continued...

So, it has been a while.

Well, I have managed to mislay the exhaust. So I have made one from some brass rod and some plastic tube. I have added it below, and the rack of jerry cans.
The other missing feature is the aerial trough. I added it from Evergreen 2.5mm H section. The aerial itself is a piece of bent brass rod. Unfortunately it has come up short, so will need to be fixed with some greenstuff.  The Jerry cans have had an additional rack base added from 2.5mm Evergreen strip.

A tow cable was added from brass wire. A hole was drilled in glacis and the wire was added, then additional fixing points were added by drilling groups of two holes and then pushing a loop through. A Rubicon tow cable loop was glued over the end.
A squad of Warlord Blitzkrieg Germans support the Panzer IB.

Tuesday, November 7, 2017

Panzer I Ausf B with Breda 20mm auto cannon continued...

The unfortunate gaps have been filled with Greenstuff. The jerry cans are just resting on the mudguards.

Some additional filling is required using Milliput.

Sunday, November 5, 2017

Panzer I Ausf B with BREDA 20mm auto cannon

The origins of the Panzer I lie in the Treaty of Versailles, and the prohibition against German tank development. The original design work was hidden as agricultural tractor development.

The new Panzer I was supplied to Franco's Nationalists in the Spanish Civil War. The new tank was not particularly effective, armed with twin machine guns and thin armour, it easily fell victim to its rival the T26. A small number were modified by raising the turret roof and fitting a BREDA 20mm auto cannon as the main armament. The mass conversion of these tanks did not take place as the Nationalists had captured sufficient T26 tanks to meet their needs.

So much for history. Now earlier I had built an FT and a Carden Loyd carrier for Operation Sealion games. For the opposition I wanted a light tank but something better than the German light tanks. So I decided that a Panzer I ausf B with auto cannon would be suitable.

Though the armour would not be able to deal with even the two pounder gun typical of British forces at the time, its light weight and availability would make it invaluable to the invading forces. the auto canon would deal with armoured cars and lighter tanks.

So, to the kit. The kit is cast in the metal filled resin typical of Empress with a bag of white metal pieces (most of which are for other Panzer I variants)
One feature of the vehicle that has required some research is the pipe that goes from the glacis to somewhere near the aerial trough (the trough will need to be scratch built. Its function has still to be determined.

The resin used by Empress likes superglue, it likes it a lot. Unfortunately I managed to get the track units in the wrong place (for subsequent builds I would glue the superstructure in first, then the tracks, hindsight is a wonderful thing).

Here is the basic model.
As you can see above, and in these detail shots, the track misalignment has lead to gaps between the body and the superstructure (and between the track units and the body on the right side).
 The gap above should be hidden by the aerial trough.
 The front and left side will require careful filling with greenstuff and milliput.

Tuesday, August 15, 2017

Thursday, June 22, 2017

Empress Miniatures Carden Loyd MMG carrier

The Carden Loyd carrier was a light tracked armoured vehicle developed in the 1930s

The Empress kit is very simple, comprising the hull in resin and the tracks and crew heads in white metal. There was very little flash, though there is mould marks around some of the rivets. The bodies of the crew and the interior are rather basic. It is also missing the distinctive tripod on the glacis (though the crew could fire the Vickers mounted on the vehicle, it also carried a tripod for more static defence).
As this vehicle is for use in Operation Sealion games, I decided that the abundance of ammunition which is a feature of British forces in that period would be represented by plenty of ammunition boxes. One of the Rubicon Allied large ammunition boxes was fitted to the glacis (a rack was added round the boxes using Slaters Microstrip).

The tripod from the Rubicon SDKFZ 250/253 was trimmed to fit on the glacis.

The model was assembled except for the crew heads. The main part was undercoated with Citadel Chaos Black (as were the heads still on their sprue). The body was then sprayed with Citadel Caliban Green (Dark Angel Green for the older amongst you).
The centre two boxes from a Rubicon large ammunition set (left over from the removal of the outer boxes for the Churchill) also fitted into one of the stowage boxes over the right hand track.
A large roll was added over the back (which might get a bit hot as it is over the engine compartment),
 A Bolt Action British infantry Spade was added to the side of the hull. The stowage box on the left hand side was covered with green stuff to form another tarpaulin.
This is a tiny vehicle, dwarfed even by the diminutive FT tank.
It needs the bridging weight and unit marks to be added and final weathering.