Monday, January 23, 2017

Rubicon Panther G - work in progress

Well, this is another project that is taking some time.

So, it is now undercoated and has the broad outline of the camouflage added (with a very broad brush).

The undercoat is PSC German Dark Yellow (by spray can). The stripes are Citadel Mourning Brown


The camouflage is going to be edged with a lighter colour, still to be determined.

The scheme is inspired by the Panther G in the Tank Museum:


Sunday, January 22, 2017

Compare the Sherman - Gun Mantlet

Here are two representations of the M34A1 gun mantlet.

Warlord/Italeri M4 kit
Warlord M4A4 kit.
Maybe I should have dusted before photographing the M4?

Note the bolt detail on the M4 kit gun mantlet.

British Steel WW2 Powered Infantry

After building the Warlord Games Galahad Armoured Infantry man, I thought I would dig out a West Wind SOTR British Steel armoured infantry man.

The first problem is the position of the arms. It appears that the position is with the gun nearly vertical and the support hand at head height.

I have to admit that that is not a particularly good pose and especially if you have a whole squad pointing their guns into the sky. In addition it is difficult to get the arms to match up.

So I took a razor saw to the arms, cutting the right arm at the wrist and the left arm beneath the shoulder. I then pinned the arms and used green stuff to fix them in place.

I still need to add the exhaust on the power pack. I am also going to add a couple of spare magazines.

Warlord Games Churchill - first lot of stowage

So I have added the first set of stowage to the Churchill.

The wrapped item after the air intake was based on a photograph on page 41 of the Osprey New Vanguard book. The back pack former was filled with green stuff. It will be detailed on the next pass.
The lower roll on the turret side was added first. Once it had set two additional pegs were added above it and again once set another bed roll was added.
Clearance was checked on the turret.
The exhaust outlets on the rear deck were drilled out, first with a 0.8mm bit, then a 1.6mm bit.

The back pack former was filled as above.
With the lack of availability of the metal ammunition boxes or similar stowage, a piece of 4mm square tube was cut and pinned between the fuel tank supports. The intention is to cover it with green stuff to simulate a tarpaulin wrapped box.

Thursday, January 19, 2017

Warlord Games Churchill - Stowage pegs added

So to support the soft stowage I have added 1.6mm plastic rods into holes drilled into the hull.
Formers for the back packs have been added to the left side of the turret and the back of the turret bin.
A Rubicon Models German Tool Box from the German Stowage Set 1 has been added to the right side of the turret. A base plate of 6.3mm wide plastic strip was added to the box, and supports made triangular pieces of the same strip were added to the sides. To ensure a good join, a piece of 4mm strip was first glued to the tool box with liquid poly. Once this was secure, the strip was then glued to the turret itself.

On page 41 of the Osprey New Vanguard book on the Churchill there is a photograph of a 7 RTR Churchill with soft stowage where the kits spare track pieces are to be mounted. This is to be replicated on the model. The spare track pieces can then be used on another Churchill, there are only two spare track links in the kit.

Tuesday, January 17, 2017

Frostgrave Barbarians - first build

So North Star have recently released the plastic barbarians for Frostgrave.

Inspired by the Game of Thrones "wildlings", I have added additional furs to the figures.

Here are the first assembled and green stuffed figures. These made use of the "colour shaper" tools mentioned in an earlier post. They do make it easier to press the green stuff to the figure as they are non-stick. Texturing was accomplished using a scalpel blade, starting at the bottom and working up to the top. Additional layers were added after the previous layer had set.

Barbarian with two handed weapon.

Another barbarian with two handed weapon.
 Barbarian with hand weapon.
Barbarian with hand weapon.
 Barbarian archer.
Barbarian Elementalist.
The staff is plastic rod. The items on the end are from the Frostgrave Cultist sprue (and a couple of teeth from a barbarian axe).


Warlord Games Churchill - assembled

So, this is the kit initially assembled.
So, the only additional work was cutting a Rubicon 0.5" ammo box set into two ends and a middle. You can see the boxes glued to the turret box. I have not added the lid as I am going to fill the box with tat and the camouflage net.
 There are strange gaps in the track runs where the pieces are glued together. They will need to be filled. I did drill out the towing eyes on the front and rear of the hull.
 There are fixing points just after the air intake filters where spare track links are supposed to be added.

Sunday, January 8, 2017

Konflikt '47 British Galahad powered suit

So at Warfare I bought the preview pack of three Galahad powered suits for Weird War 2 games.

I decided to build the first one on a 30mm lipped base to match my existing Westwind SOTR figures (especially the British Steel powered suit).

The figure came as a pack of three with four right arms with MGs, eight left arms and four heads with  British helmets and no gas masks.

 Note the spare magazine on the left hip. I reinforced the joins on the arm with greenstuff.
It is not clear if this is supposed to be the AA magazine on a Bren gun or a Vickers K gun.

This has been undercoated and will be base painted with PSC British tank green.

Warlord Games M4A4 Sherman V - engine deck

So now I started to load stowage onto the rear engine deck.

The Rubicon Models Allied Stowage set provided a British toolbox (I added a catch on the side) plus two crates from the German Stowage sets. As is traditional, I added a plastic rod peg on the front right mudguard for the soft stowage there plus another two pegs for the big roll to go on the engine deck. Two pieces of square section tube from Plastruct were pinned to the deck.

 Here is the roll on the glacis.
 Overhead view showing the tarpaulin sculpted over the boxes, the big rolled tarp and a piece of tarp on one of the crates. This was completed in three bits (to allow the previous pieces to set), starting with the tarpaulin over the plastruct crates.
Rear quarter view (also showing where gaps needed to be filled on the turret (milliput makes a smoother filler here).
 Side views.

Rear view.

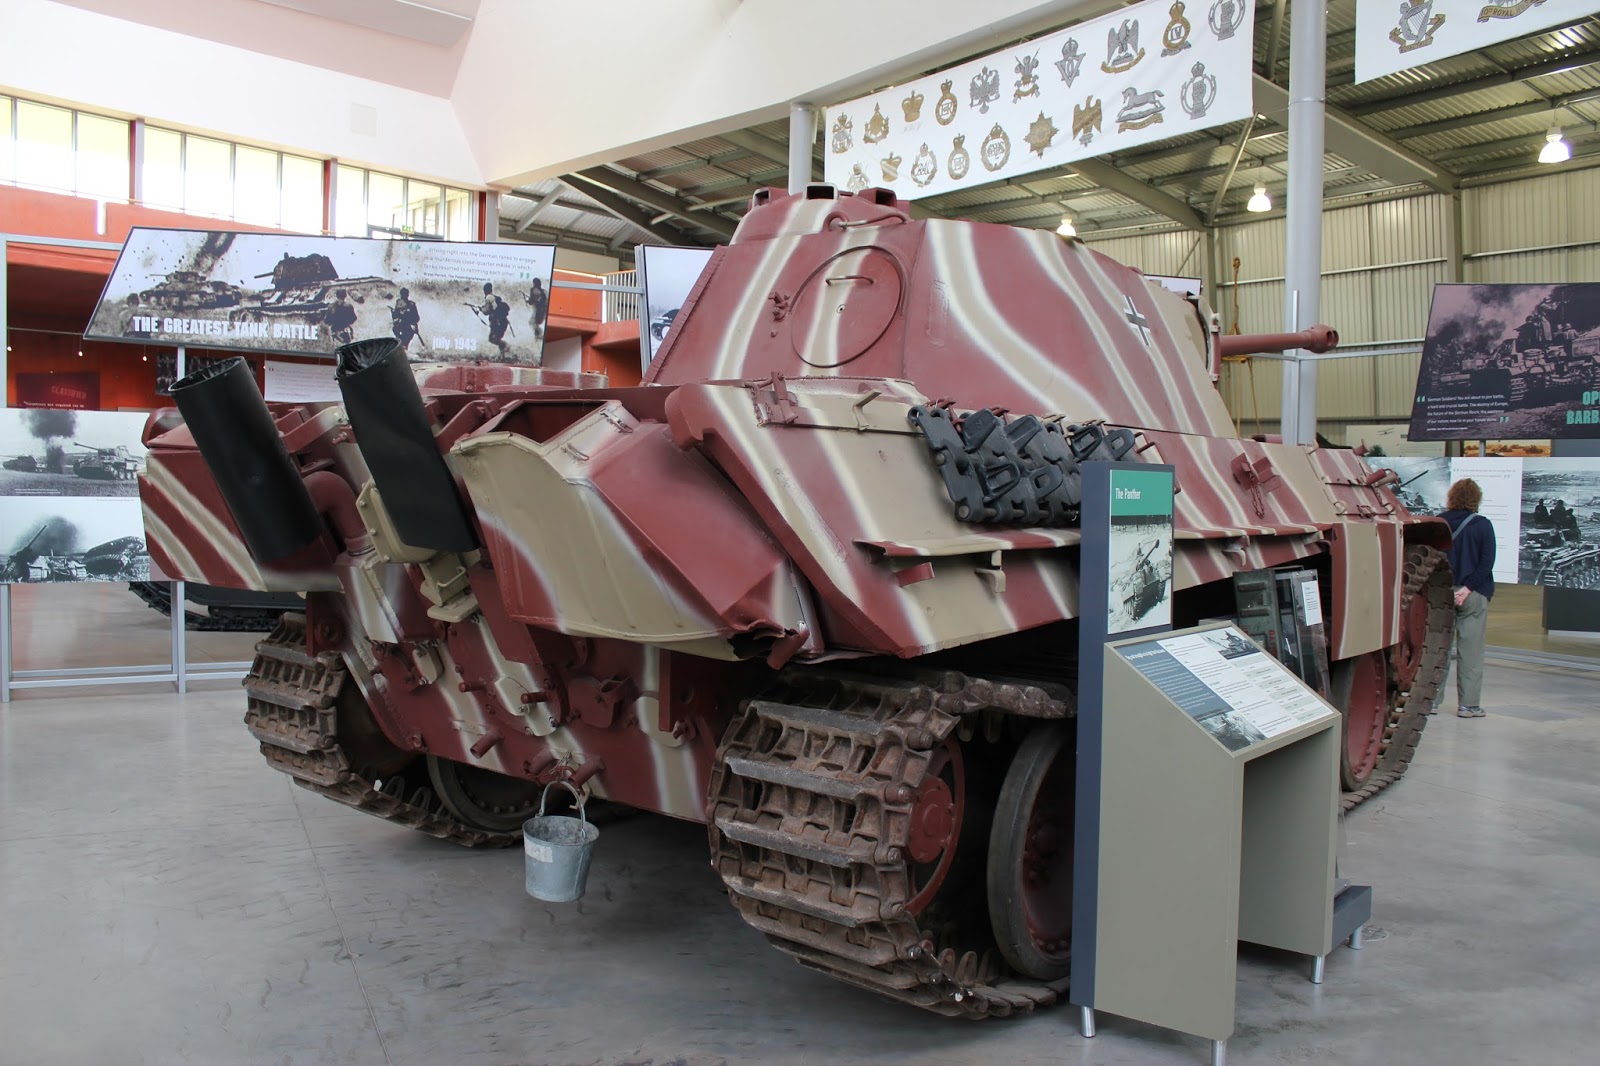
Now, it was at this point that I remembered that I needed to add the fire extinguishers by the rear lifting rings. Now according to the Warlord Games instructions, the tube end of the extinguisher faces forward. However in the photographs from the IWM, it can be seen that there is an obvious raised bracket towards the rear that would take the tube end.

Checking the photographs in Dennis Oliver book also show the extinguisher facing towards the rear, so that is how I attached it to the model.

The model has now been undercoated but requires the base colour (PSC British Tank spray).

Colour Detailers

While having a reading another blog, I thought this was interesting, from the Maelstrom's Edge blog.

The article is about adding green stuff gas masks to figures (SF rather than historical) but the writer uses tools he refers to as "silicon clay shapers" or "colour shapers".

Now my local The Works (suppliers of cheap books, hobby supplies and tat) offer something which looks just the ticket.

Looking like silicon rubber paint brushes, it is claimed they do not stick to green stuff and hence can be used to sculpt green stuff before it sets.

We shall see.

Thursday, January 5, 2017

M5 Combat Vehicle Stuart Gun Tractor (Stuart VI)

One vehicle I noted at Duxford was an M5 Stuart Gun Tractor.

Based on the M5 Stuart tank with the whole turret and supporting deck removed.

Unfortunately I could not see into the crew area.

This vehicle was used to tow the 17 Pounder anti-tank gun by British forces.

Not to be confused with the US M5 High Speed Tractor, which is a completely different vehicle.

Rubicon Models Studebaker U3 Katyusha BM-13 MRL, continued

So the assembly continues.

Assembly of the rocket frame does require concentration and removal and clean up of each rail individually before assembling the part and then starting on the next one. The parts are different and need to be assembled in the correct order. The plastic is resistant to my normal Humbrol Liquid Poly.
 The rack can swivel from side to side (only a small angle) and can be raised and lowered.
The only part that is shared between the two optional load beds is the spare wheel. I used the kit item on the MRL version as it is the most obvious.

I used one of the spare wheels from the Rubicon Allied Stowage set on two pieces of 0.30" square plastic rod for the cargo version. Be careful that you do not mount it too high otherwise it will interfere with the fitting of the load bed.
 And here it is fitted to the chassis.